Tools needed
- Painter’s tape
- #2 Phillips head screwdriver
- The brass door key that came with your pod
- Current version of the Mamava App
Estimated time to complete
- 10-15 minutes
Step 1: Unpackage your new lock.
- Make sure to keep the box in working shape as you’ll use it to send back your parts.
- Take a photo of the yellow lock information label located on the back of the new outer lock body. You'll need to email this to Mamava after the installation is complete.

Step 2: Remove the old lock from the door.
- Open the pod with the key.
- If you’ve misplaced the keys, here’s how to request one.
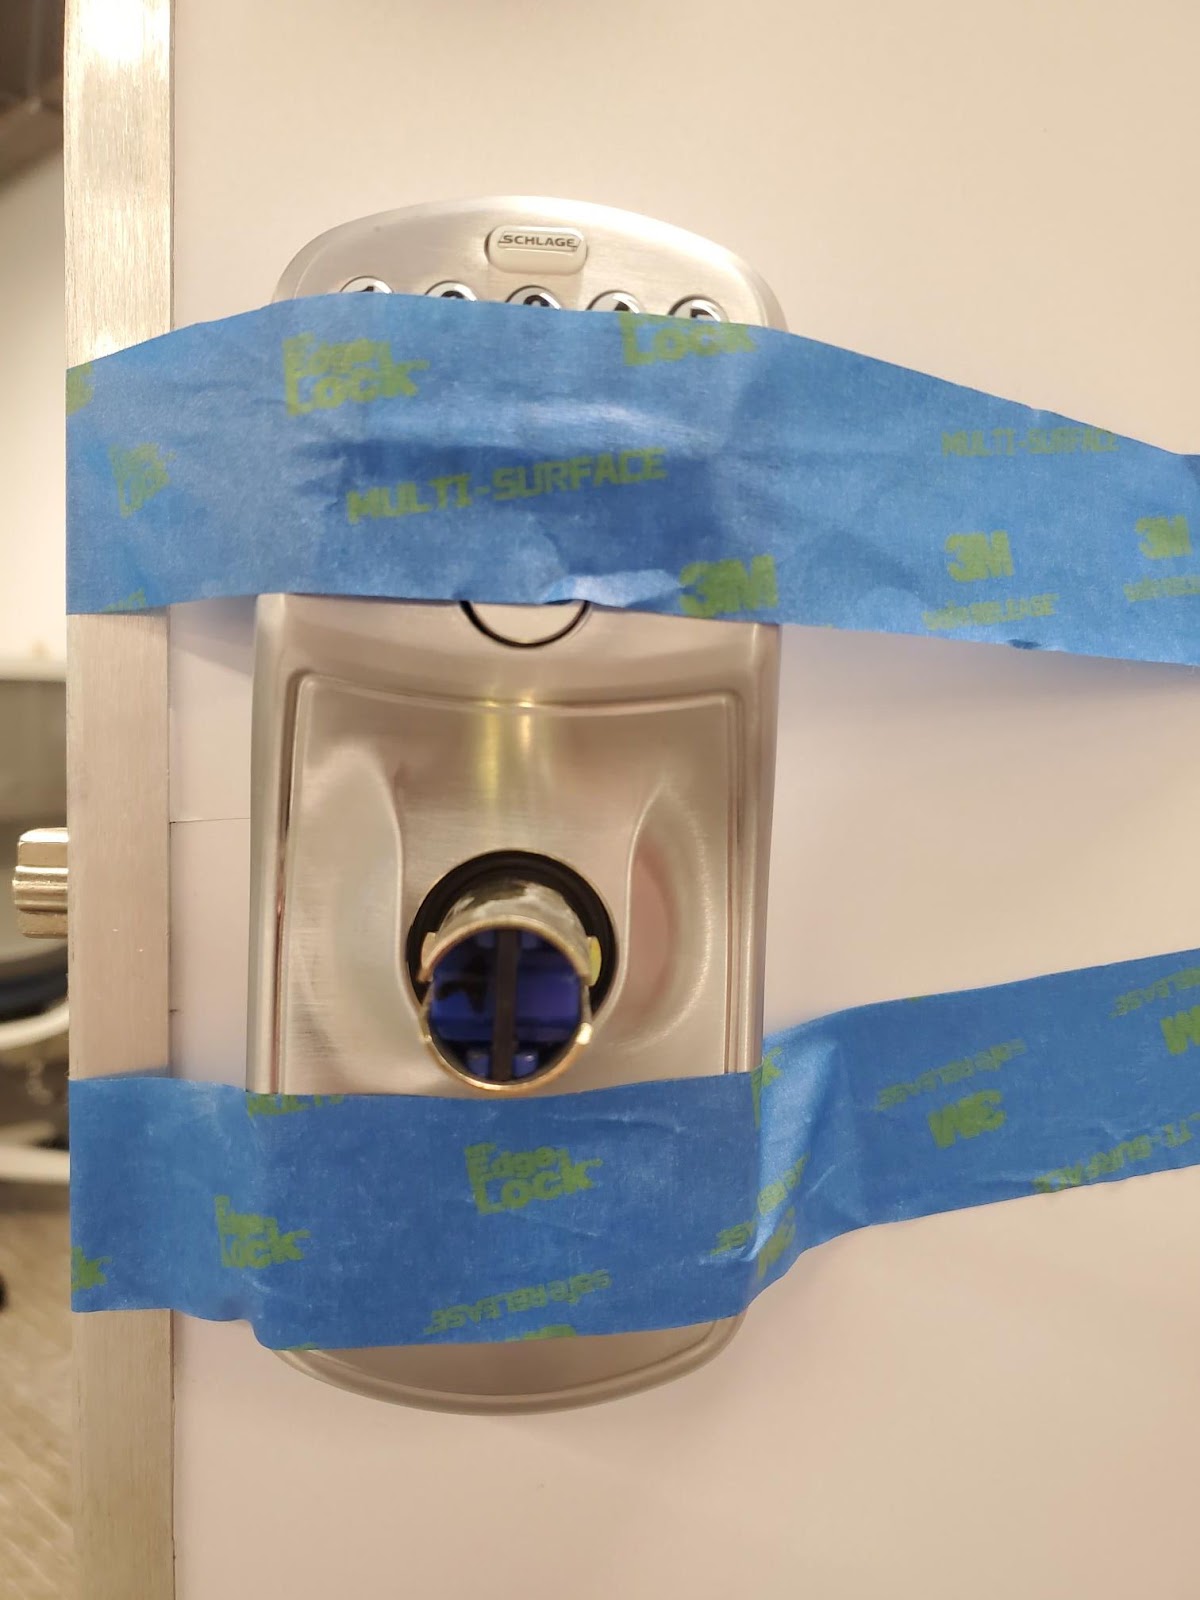
- Secure the outside lock (keypad) to the door with painter’s tape so it won’t fall off while the screws are being removed.
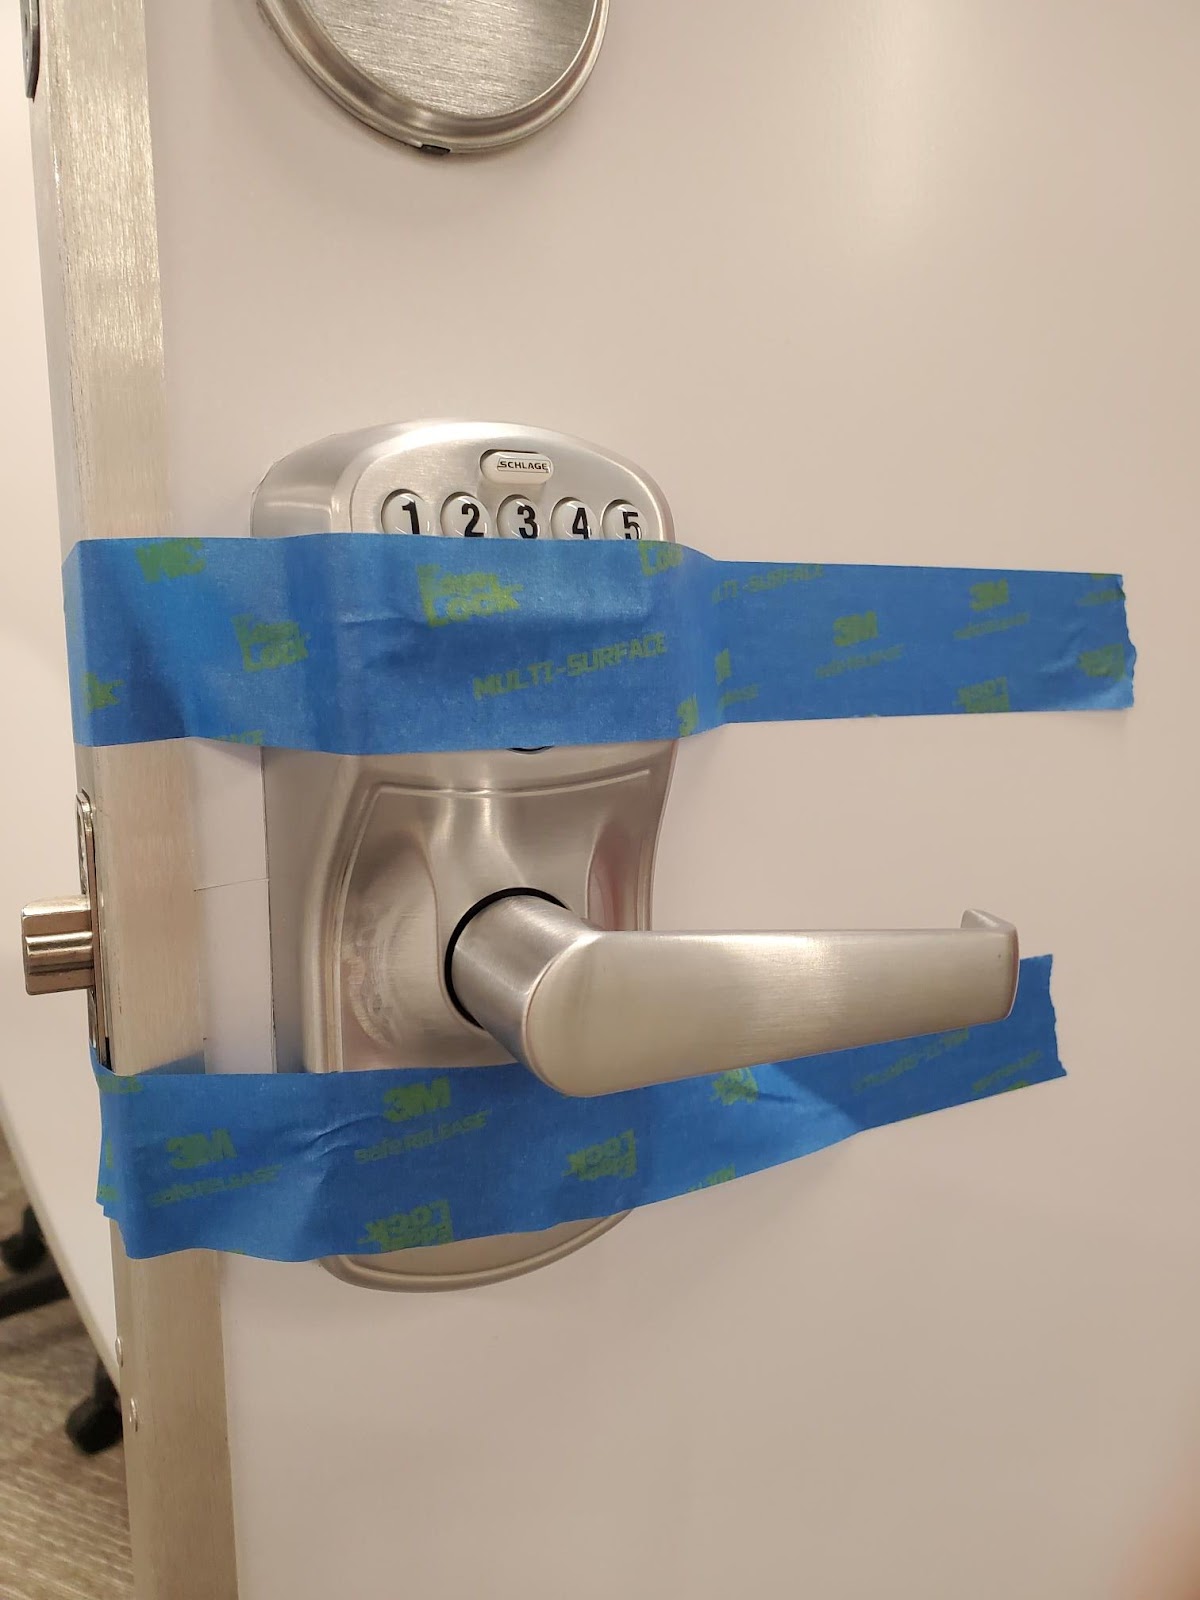
- Use a #2 Phillips head screwdriver to remove the two head screws on the inner faceplate/handle inside the pod. Set the inner faceplate/handle and screws aside for now.
- Gently remove the outer lock body and be mindful of the wires that connect it to the door. Don’t dispose of your painters tape yet! - it will come in handy for installing the new lock.
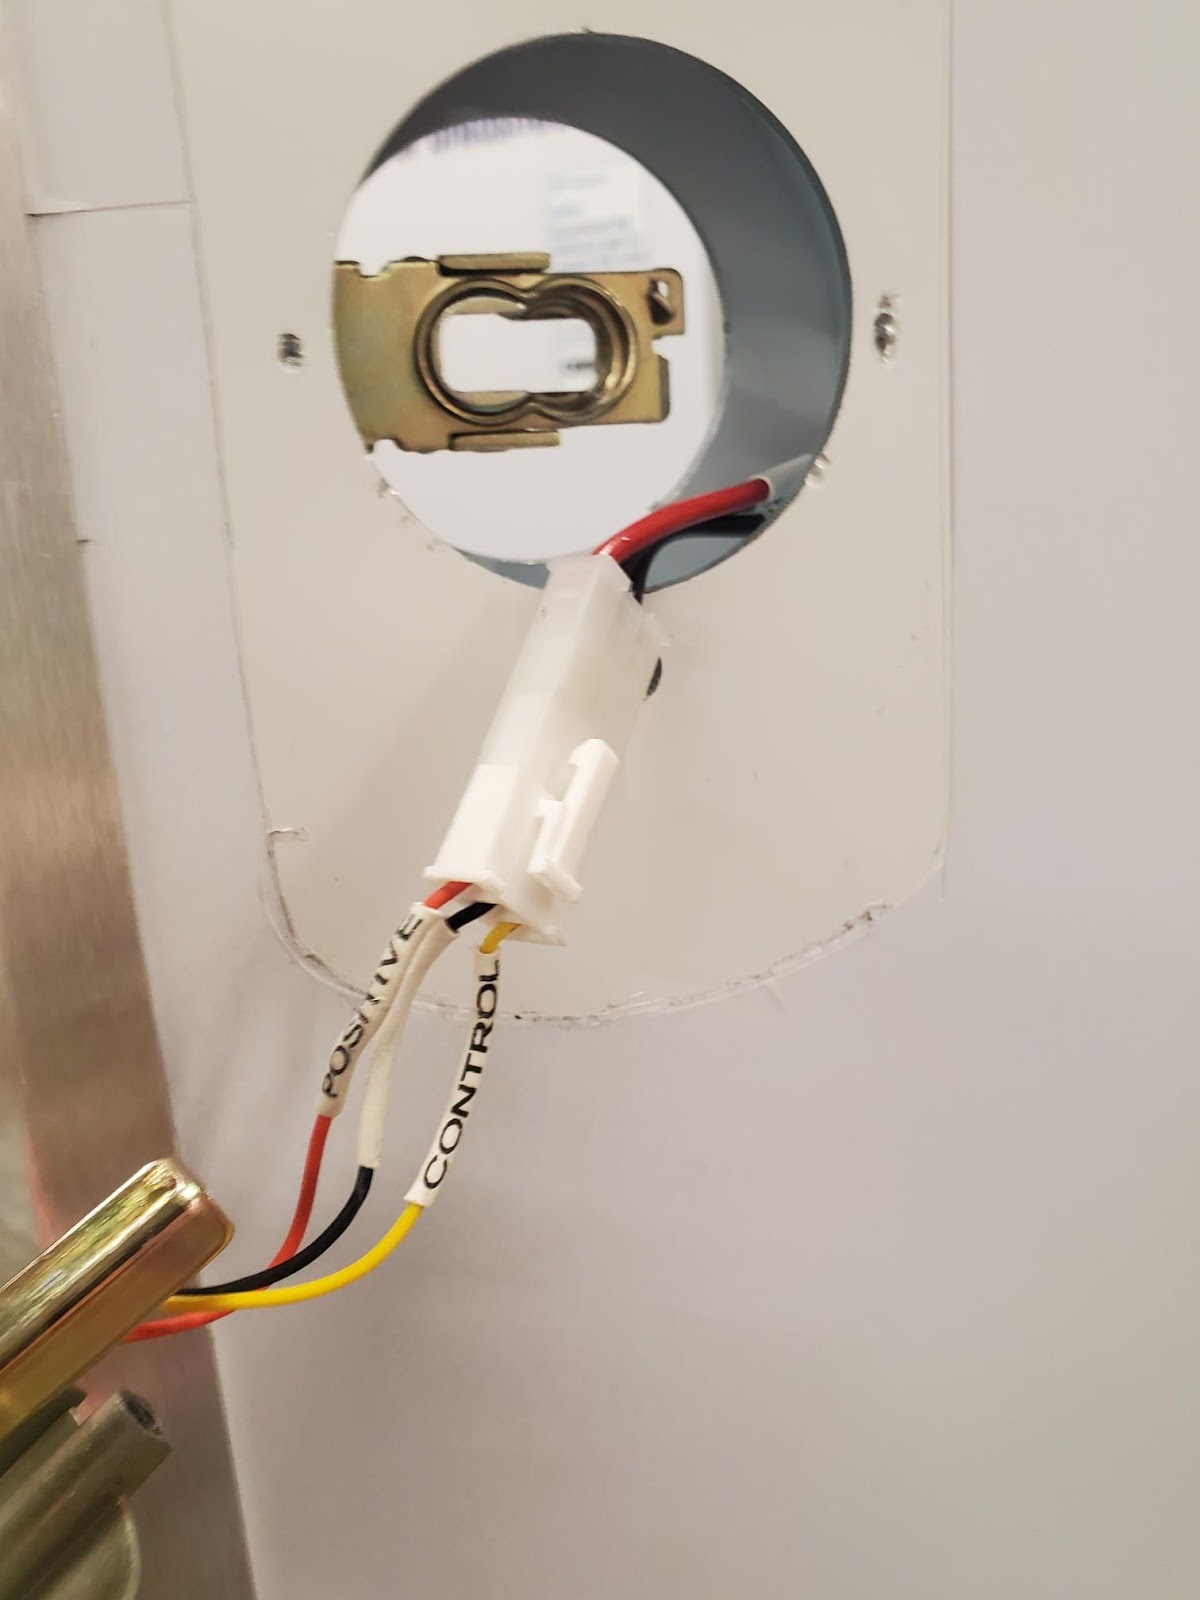
- Disconnect the white Molex connector by pulling up gently on the white tab.

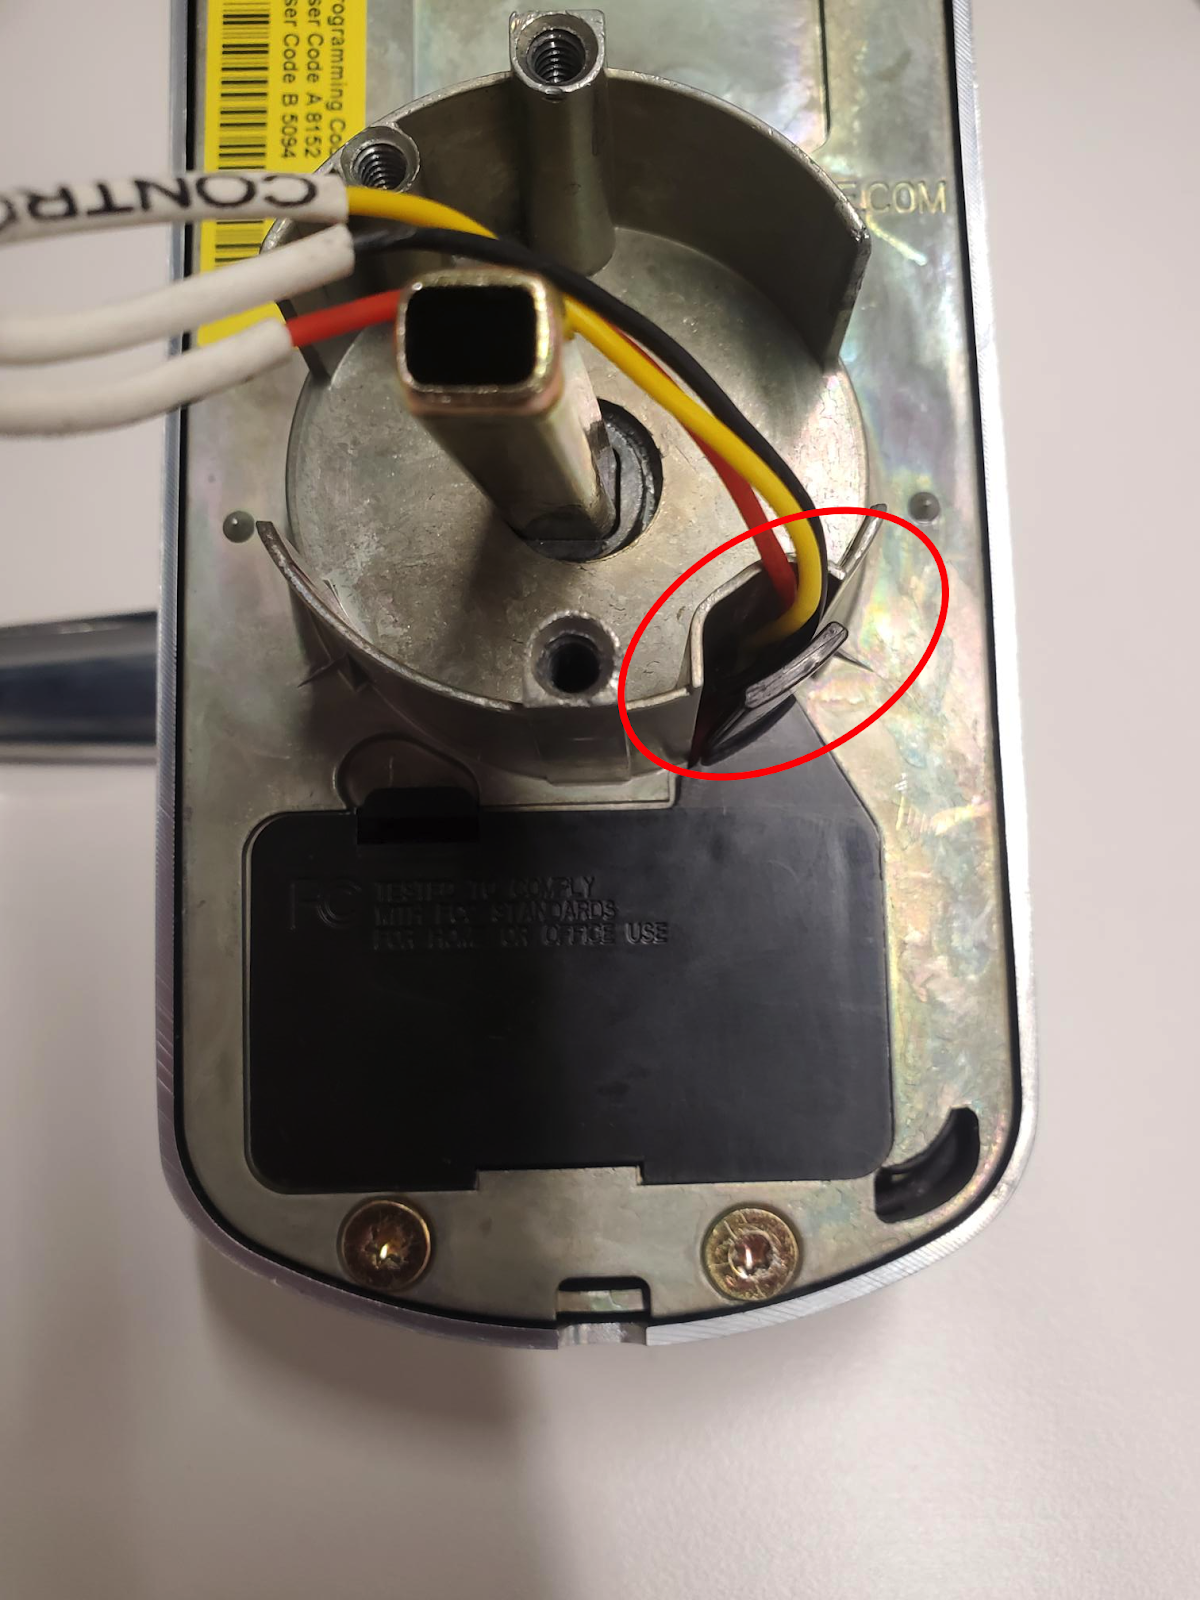
- Install the provided battery into the lock body and clip the protective cover in place. The wire harness needs to pass through the channel to protect the wires. Position the wires so that they are guided up and around the internal lock so that they aren’t pinched!
- Connect the Molex connector from the door to the new lock—be careful not to force it. The clip will align with a small tab on the connector coming out of the door.

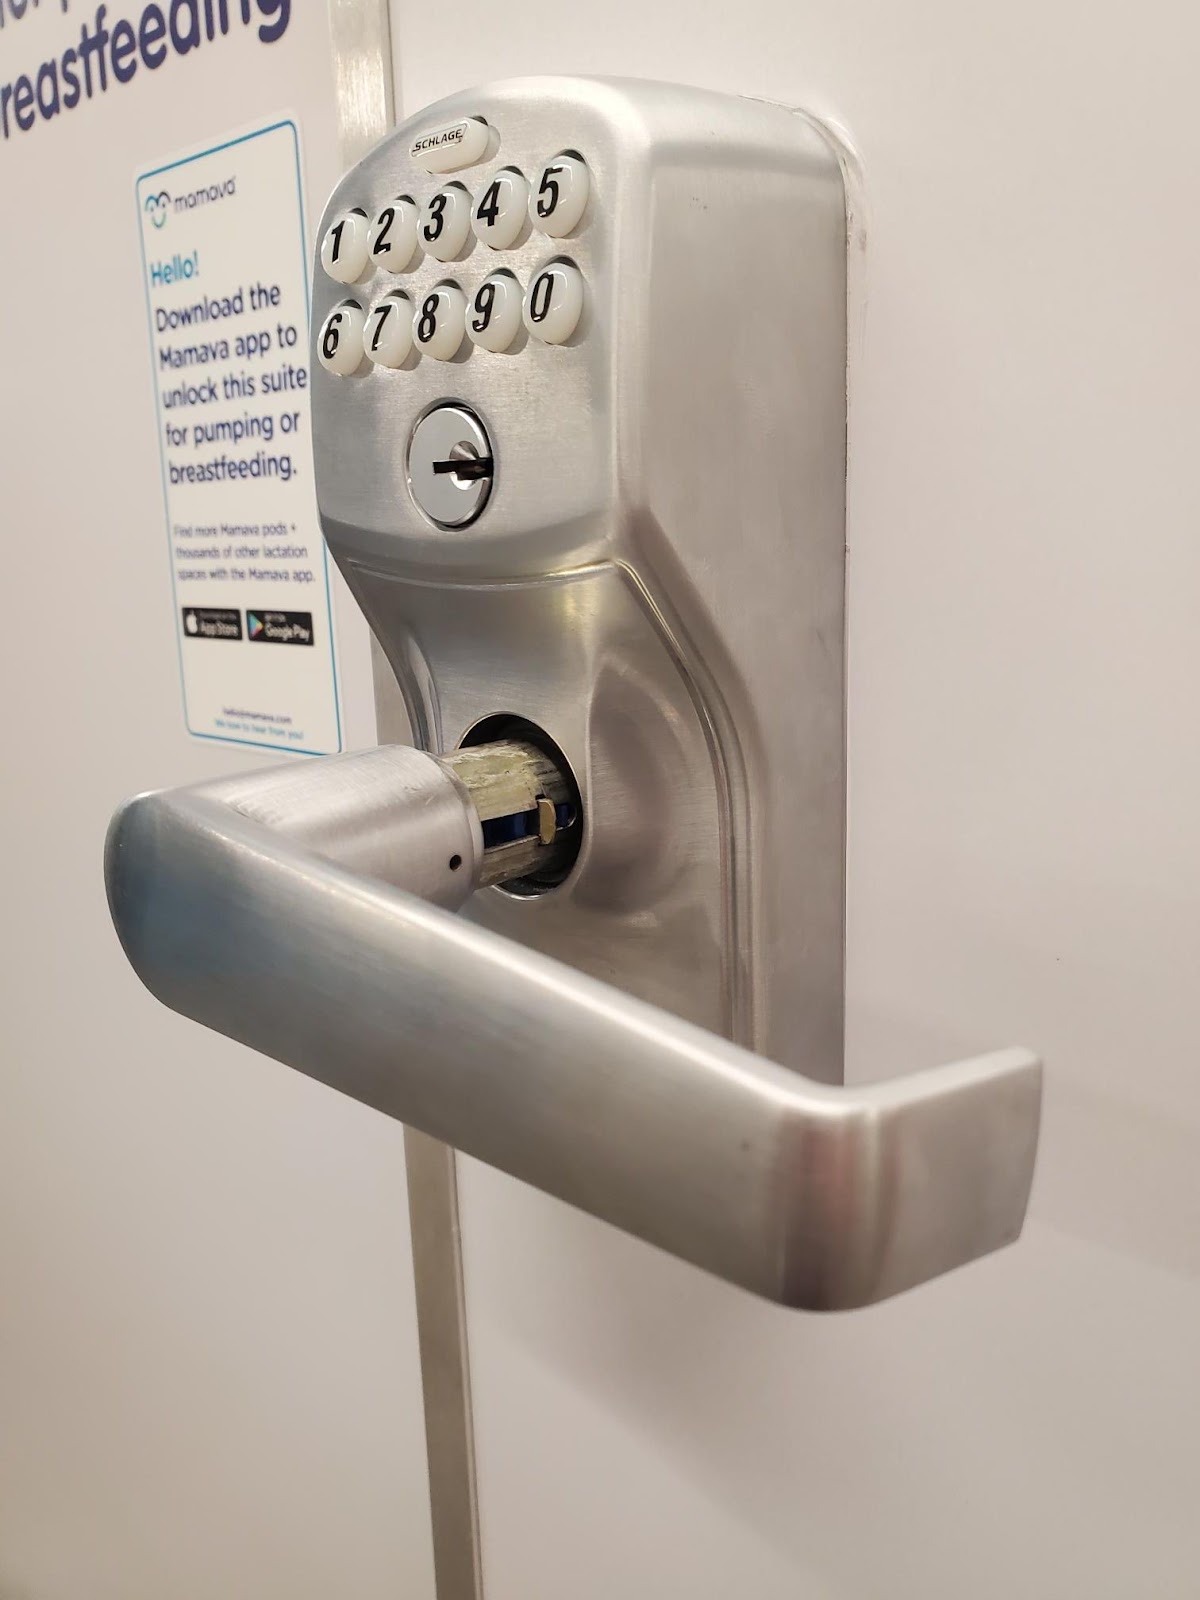
- Install the outer faceplate/handle (keypad) to the outside of your door. The square axle will pass through the latch mechanism, but may need to be rotated 90 degrees.

- Again, check that the wiring is tucked away so there’s no chance of pinching when the inner faceplate/ handle is installed.
- Reapply the painter’s tape to keep the outer faceplate/handle secure.
- Line up the inside door faceplate/handle with the outer lock body and thread the two screws through the holes of the inner plate.
- Verify that the lockset is aligned vertically before fully tightening the screws.
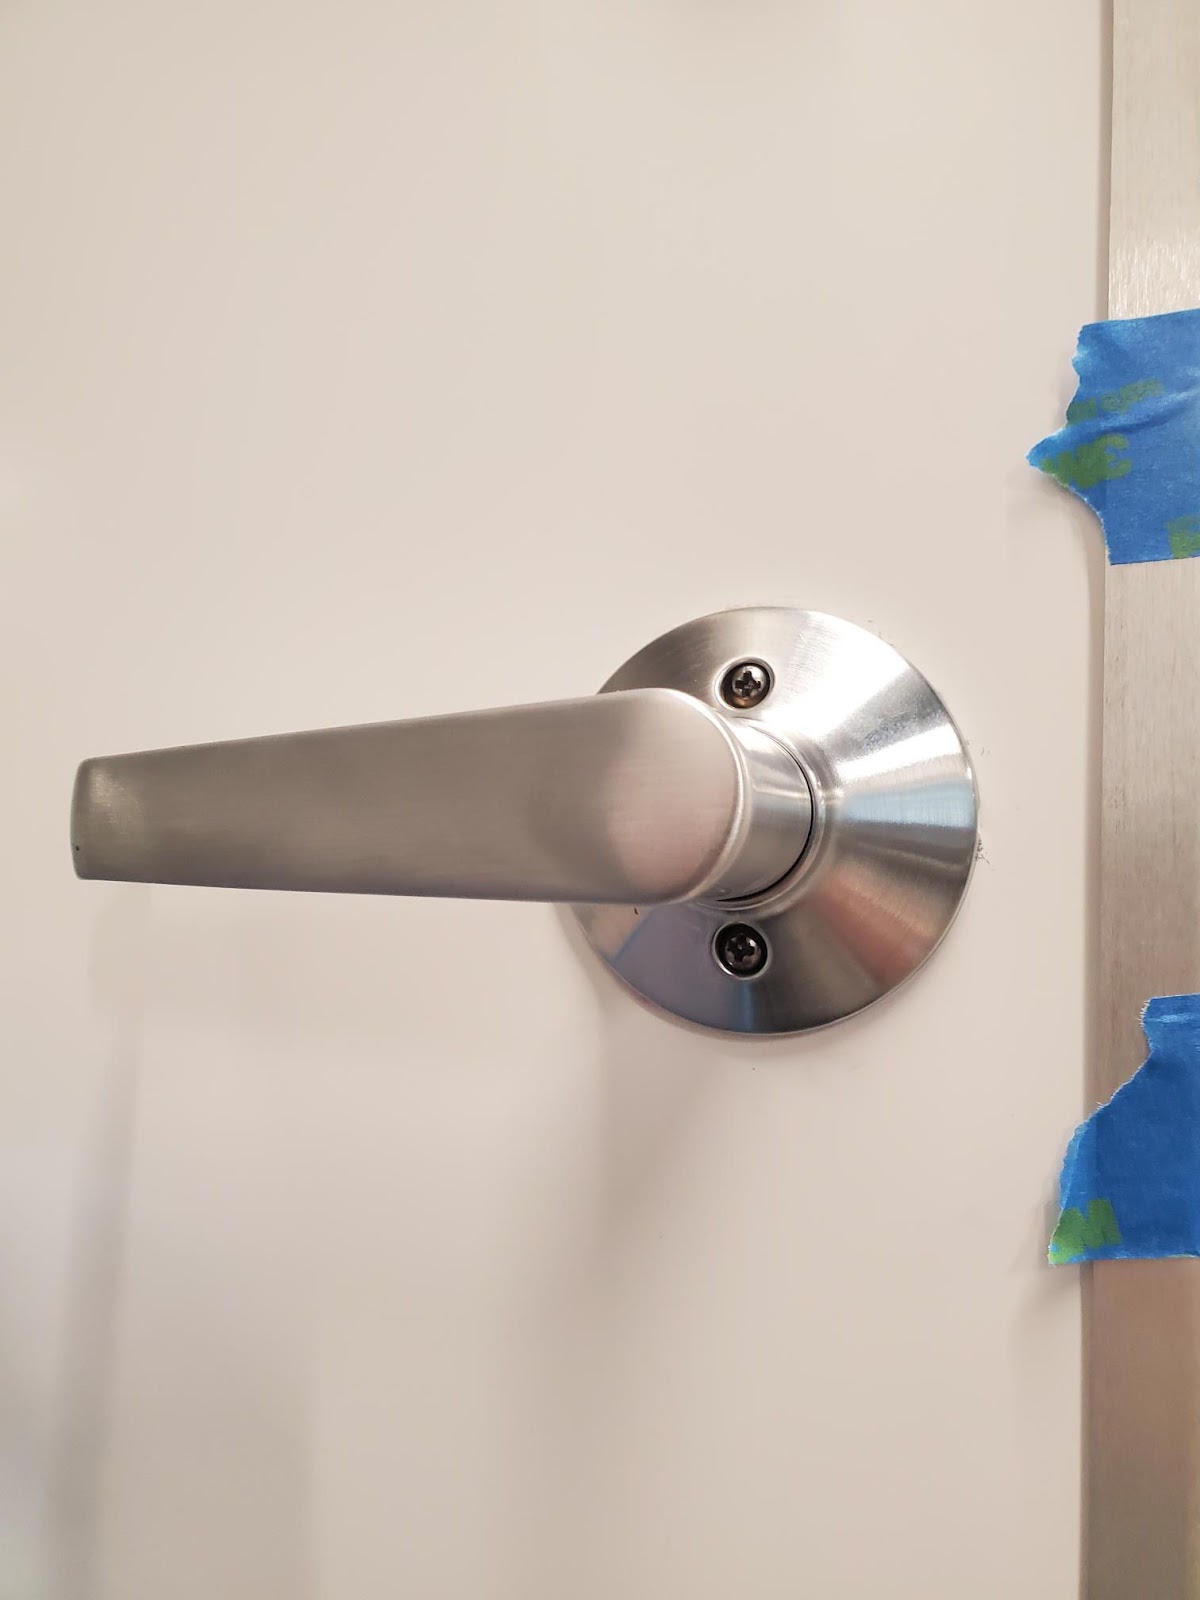
- Align the new exterior handle horizontally and push until the inner lock engages with a click.
Step 4: Test the lock
Make sure the pod is plugged in and the door is locked before you run your tests.
- Does the pod unlock using the provided keypad codes?
- Does your pod appear on the Mamava app? Are you able to unlock the pod using the Mamava app?
- Does the occupancy indicator on the Mamava app change to “Occupied” after you enter the pod and lock the deadbolt?
Step 5: Email photos to Mamava
- Take a photo of the pod’s serial number, located on the inside the door frame— right on the top of the door jamb.
- Send the photo of the lock serial number AND the pod serial number to help@mamava.com. If this step is not completed correctly, your new lock will not work with our app.
Step 6: Ship the old lock back to Mamava
- Please pack the original lockset, along with its matching key, in the box the replacement lock was shipped in. Use the shipping label provided to return the lock to Mamava within the next seven days.