This article provides instructions for installing the V4 upgrade kit.
Upgrading your pod to a V4 will increase the functionality of your pod by connecting it with the (free!) Mamava app. Breastfeeding parents will be able to find and unlock your pod, check occupancy status, and adjust the lights to suit their needs. To purchase a V3.3 to V4 upgrade kit contact sales@mamava.com.
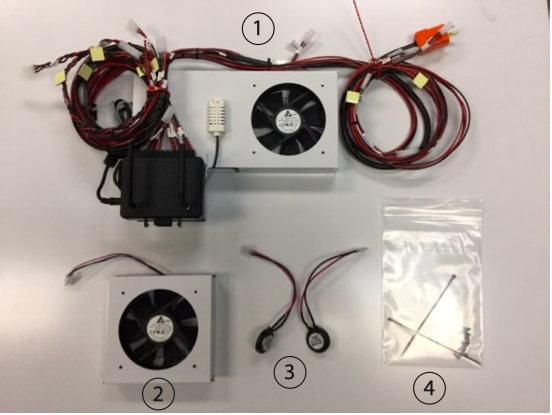
Upgrade kit components
Be sure to inspect the package and instructions to ensure that you have all components:
- PCD/fan assembly
- Front fan assembly
- 2 audio exciters (pair)
- 8 #8 X ½ screws
- 2 6” cable ties
Contents of upgrade kit:
Tools needed
Use hand tools so as not to damage the pod.
- #3 Phillips head screwdriver
- Flat head screwdriver
- 6’ ladder
- Small wire snips
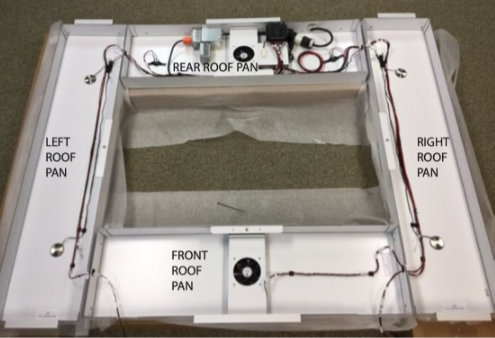
Image of completed upgrade to roof pans from a front facing orientation:
Instructions
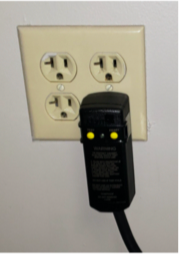
- Disconnect the pod’s power supply by removing the GFCI plug assembly from the wall.
- Use the #3 Phillips head screwdriver to remove the perforated pan, graphics caps, and roof caps (F103) from the top of the pod as shown below. You will need to reposition your ladder to reach all of the components.
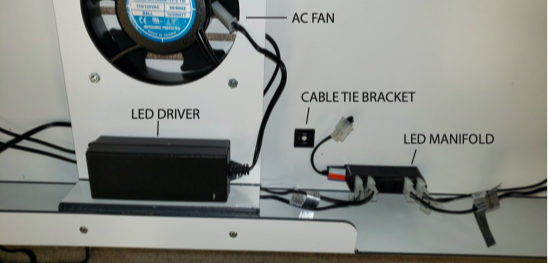
- Unplug all of the devices from the SWITCHED OUTLET box and carefully cut the cable ties that hold the wires in place. Leave the cable tie brackets (3) in place as you may use them later.
-
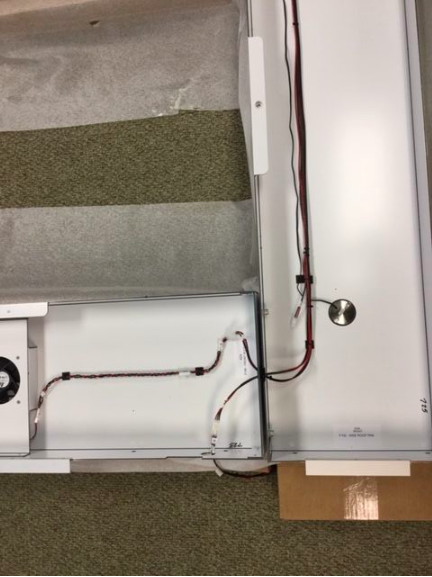
Cut the cable tie holding down the wire for the LED manifold, and disconnect the Molex plug that supplies the power from the LED driver (leave the LED manifold in place).
-
Remove the hardware to the LED driver and the AC fan assembly. Once you’ve removed these devices and all associated power cords, you can discard them. The rear roof pan should look at this:
-
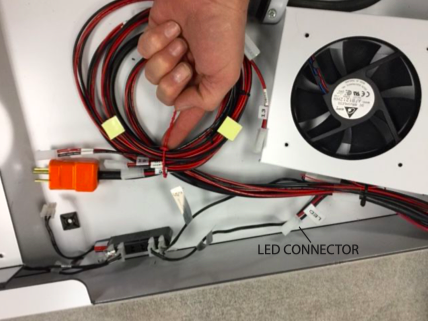
Carefully position the large connector set labeled (C) to the side as shown above. You may need to pull some extra cable up through the back wall of the unit. It helps to have assistance guiding the cable.
-
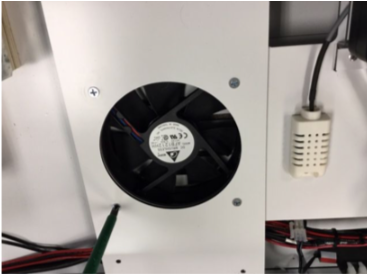
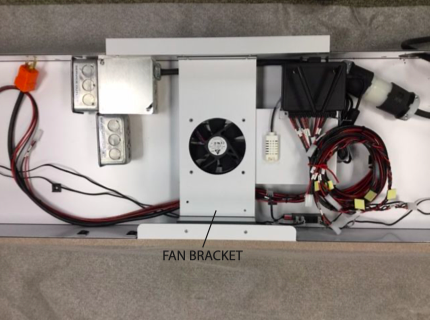
Place the PCD/fan assembly into the rear roof pan as shown below.
-
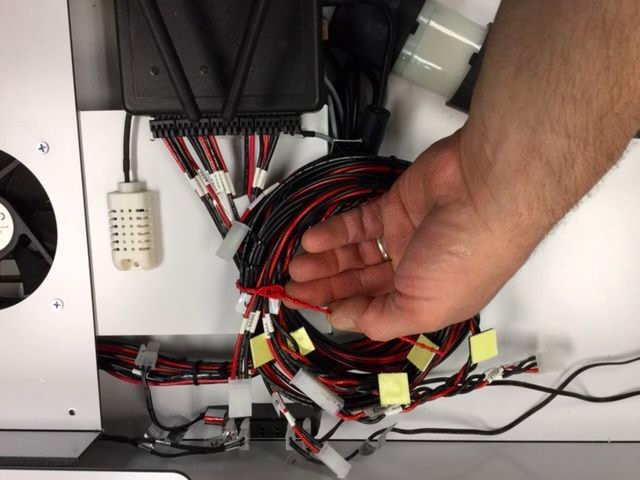
Open the beaded tie on the side of the assembly facing the left side roof pan. Feed the coil of wires toward the left side roof pan, under the fan bracket of the rear roof pan. Make sure the LED connector doesn’t hide behind the fan bracket.
-
Slide the whole PCD/fan assembly under the fan bracket so that the holes line up as shown below. Keep the large plugs (C) to the side.
-
Fasten the assembly into the fan bracket using 4 of the #8 X ½ screws.
-
Feed the remainder of the wire harness through the hole into the left side roof pan. Use one of the 6” zip ties to bundle the wires traveling through the rear roof pan. Anchor the cable tie with the cable tie bracket.
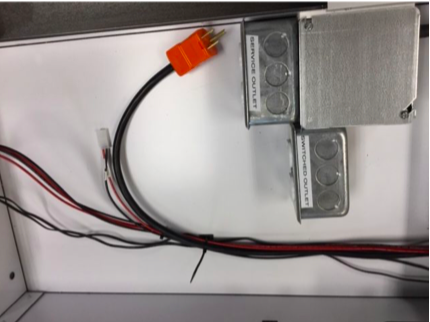
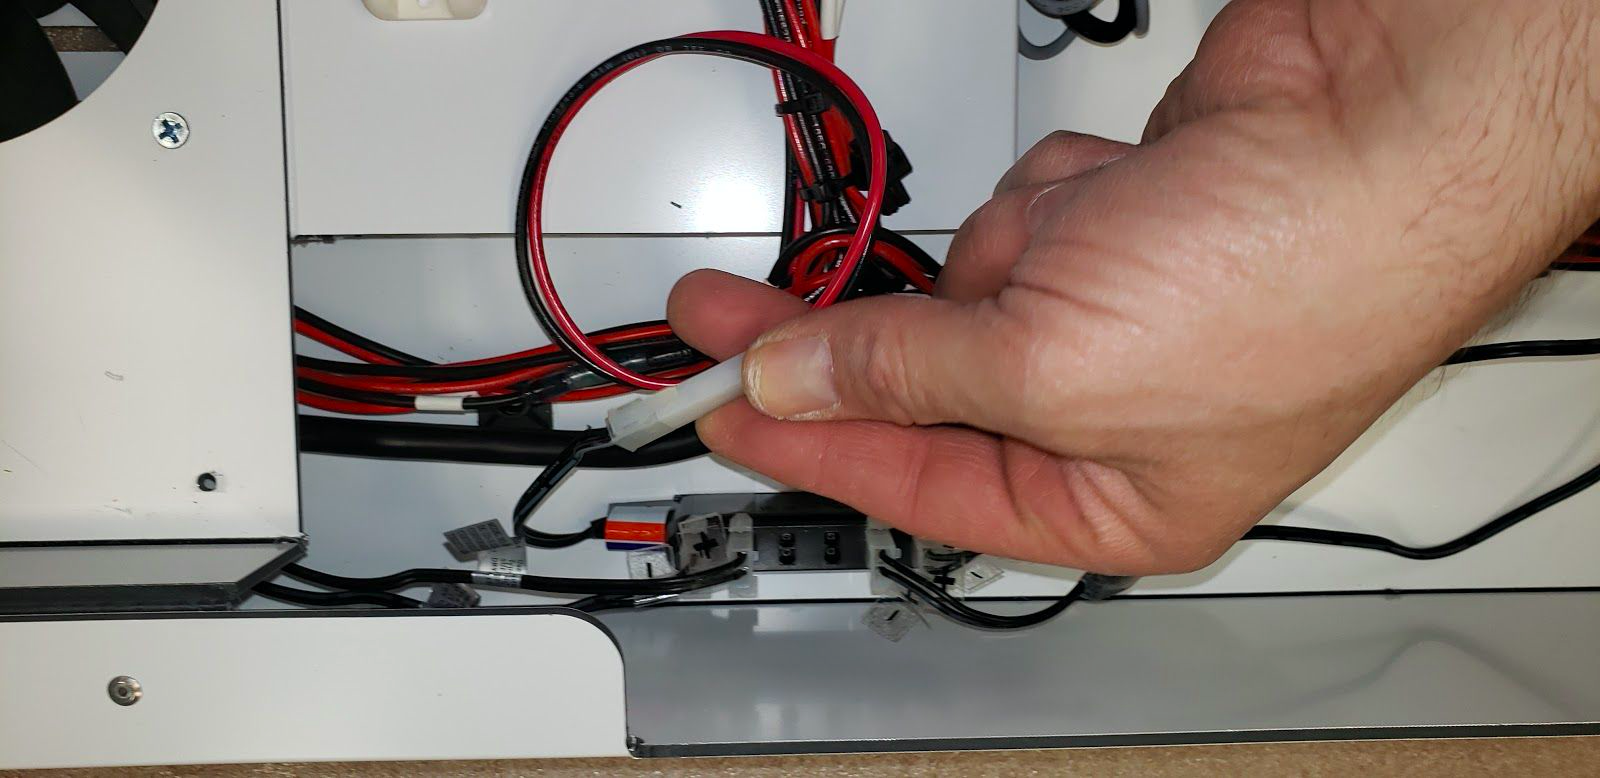
- Plug the orange plug into the SERVICE OUTLET as shown below.
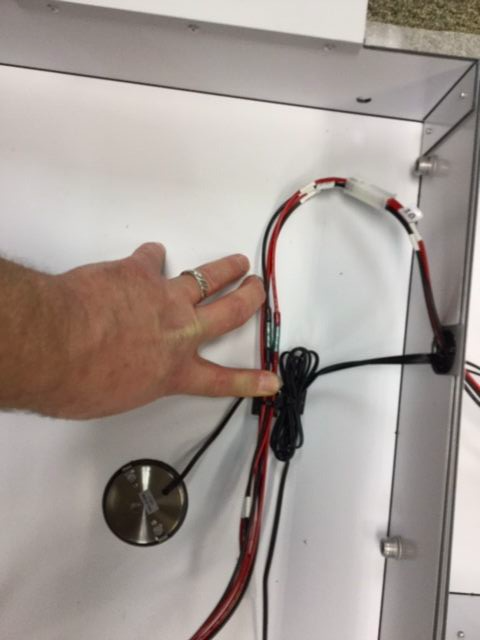
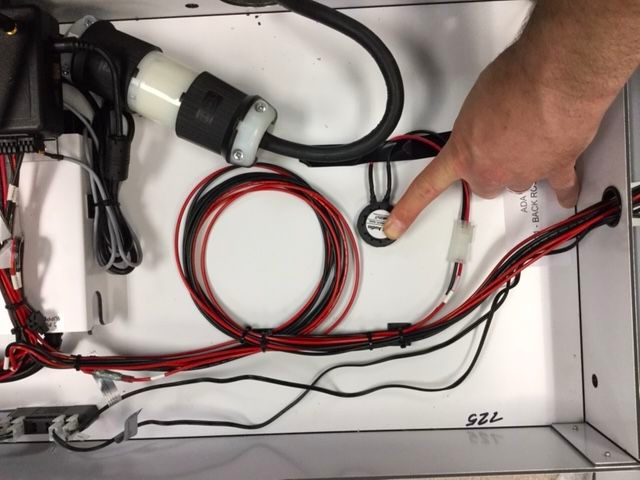
- Next, remove the paper ring from the face of one audio exciter and stick the audio exciter to the rear roof pan as shown in Fig. 13. Hold it down with a firm and even pressure for about ten seconds. (It helps to clean the surface first with an alcohol wipe and allow it to dry thoroughly.) Connect the audio exciter’s two-pin Molex plug to the available connector. The rear roof pan should look like the image below.
-
On the other side of the hole in the left side roof pan, remove the paper on the back of the first cable tie bracket and attach it to the pan next to the existing cable tie bracket, as shown below.
-
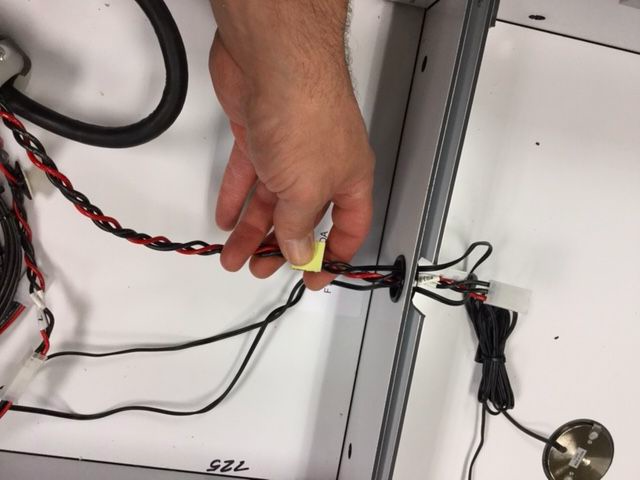
Stick the remaining cable tie brackets to the front corner of the left side roof pan. Feed the tail end of the wire harness through the hole into the front roof pan, and then connect it to the tail in the front roof pan from the left front wall panel.
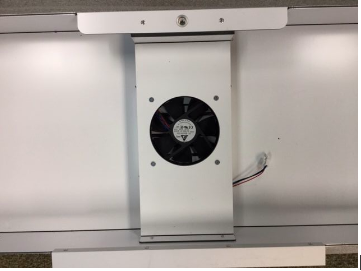
- Fasten the front fan assembly into the front roof pan with the remaining 4 #8 X ½ screws.
- Untie the beaded cable tie in the rear roof pan and open up the wire harness that goes to the right side roof pan.
-
Feed the end of the wire harness through the hole into the right side roof pan. Be careful that all the components fit through safely.
-
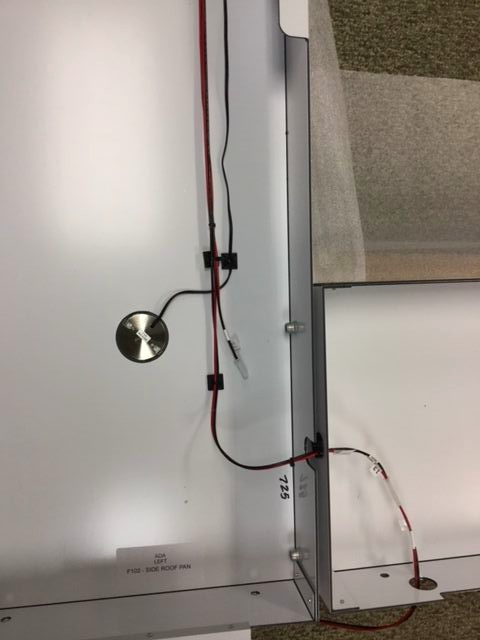
Attach the remaining audio exciter in the same manner and remove the paper on the cable tie brackets to connect the wire harness to the rear roof pan as shown below.
- Connect the LED manifold to the LED wires coming out of the wire harness.
-
Just as you did with the left side roof pan, stick the wire harness into place in the right side roof pan by removing the paper from the cable tie brackets.
- Feed the remainder of this harness through the hole in the front end of the right side roof pan and into the front pan. Place the twisted wire harness (labeled harness 4) in the front roof pan. Complete the installation by making sure all the connectors go together as shown below.


Whew! Congratulations on finishing your pod upgrade. Check that all of the power connections are made, re-install the roof cap (F103), and plug in the GFCI plug assembly.
Once electrical service is restored to the pod for approximately three seconds, you should hear three tones letting you know that it’s ready to use. The default settings for the system will set the lights automatically to 100%. Users will now be able to use the Mamava app to adjust the interior lighting to their preference.