Where should I put my Mamava pod?
There are a number of important factors to consider when you're scouting the best location for a Mamava pod.
Mamava lactation pods are intended for indoor use only.
- Make convenience to breastfeeding parents your top priority.
We recommend placing your pod near a bathroom for easy access to a sink or changing table. Plus, displaying your Mamava near other amenities demonstrates your support for breastfeeding. - Make sure the pod fits the space.
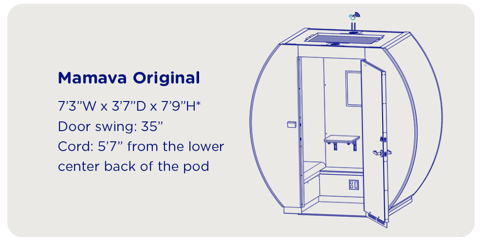
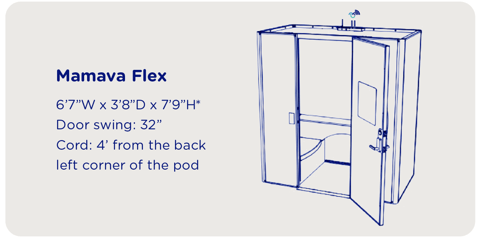
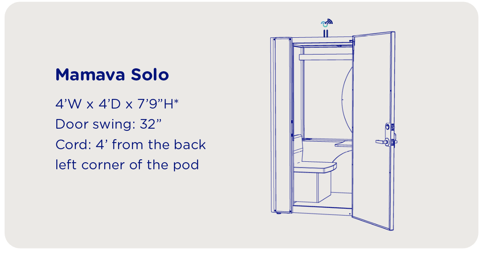
The Original requires a ceiling clearance of 8’6” while the latest version of the XL requires 8’4” of ceiling clearance during assembly to slide in the side panels from above. For a Flex or Solo pod, a 7'9" ceiling height is needed during assembly.
Mamava XL

Mamava Original

Mamava Flex

Mamava Solo V2.2 and Solo Base

- Ensure privacy.
If your model has a perforated roof (XL/Original V4/V5, Solo V1.1), avoid placing it in a stairwell, directly underneath security cameras, or anywhere that has an overhead view. - Place the pod within 2’ of a standard outlet.
The Mamava pod comes with a GFCI-protected electrical cord that plugs into a standard 15A 120V receptacle. (The XL requires a 20A 120V receptacle.) The pod draws about 6.5 amps of power. Be sure the cord does not span any walkways. - Consider temperature.
Vent fans help to move air, but do not heat or cool the pod. Place your pod in an area that’s comfortable in terms of temperature. - Ensure cellular service or WiFi.
Breastfeeding parents need cell service or WiFi to use the Mamava app. (Does not apply to the Solo Base model.) - Find a flat surface.
Place your Mamava on a flat, consistent surface. Not advisable: grouted tiles, brick, or sloped floors. Low-pile carpets are OK. - Assemble the pod as close as possible to the final location site.
Once assembled, XL, Original, Flex, Solo V2, Solo V2.1, and Solo V2.2 can move on built-in caster wheels, but consider this furnishing like you would a refrigerator—you don’t want to be scooting it too far or up sloped surfaces. - Take care when moving your Mamava pallet.
- If your team is assembling the pod, use a cart or dolly to move the pallet to the assembly spot. If you’ve selected professional installation, you’re all set!
- Don’t stack Mamava pallets on top of each other at any time.
- Consider the dimensions of the pallet as you plan your route from delivery site to assembly spot.
- We hope you’ve found the perfect spot to place your Mamava for the long term! If you should ever need to move the pod, refer to this article for instructions.